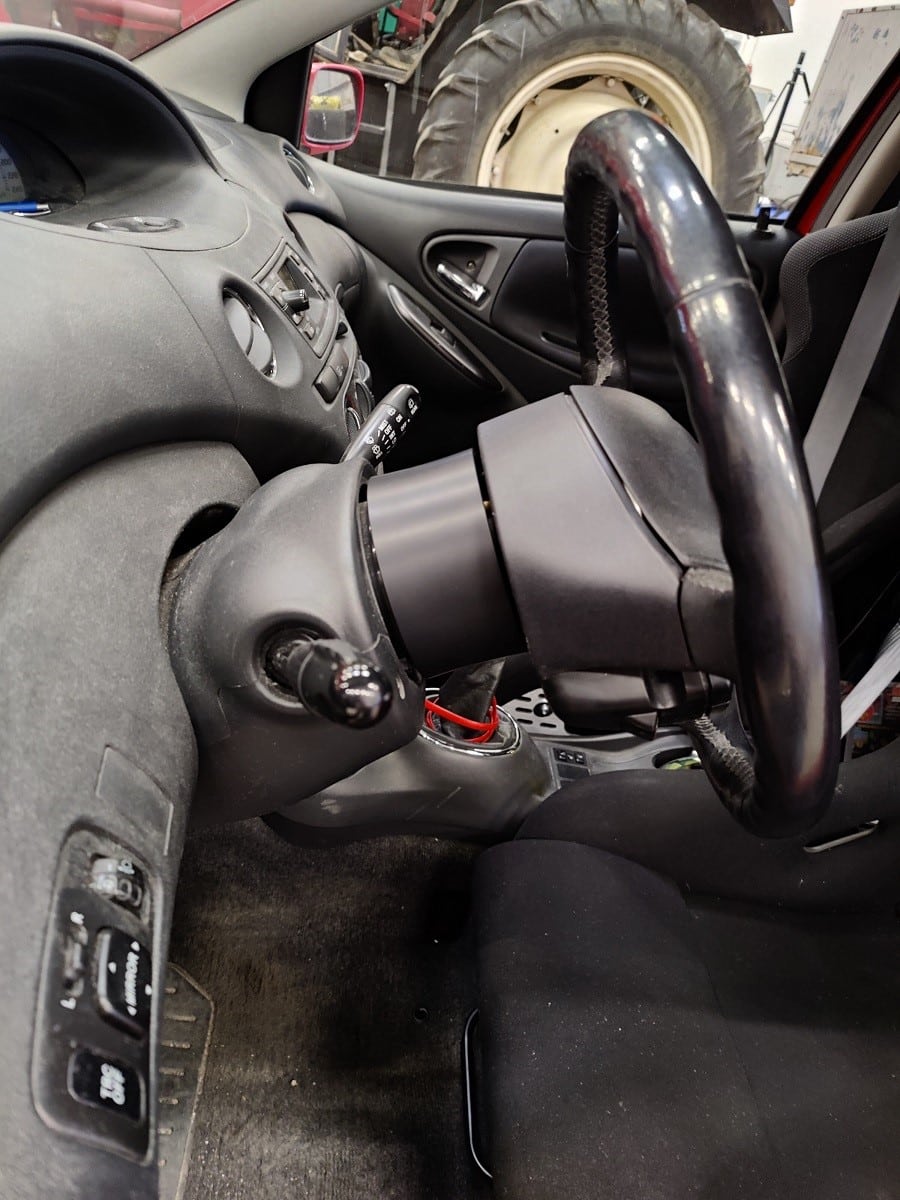
Distanziale al volante montato su Toyota Yaris T-Sport 2003, guida passo-passo
Guida fai-da-te all’installazione del distanziale al volante
Inauguriamo il nostro blog con una guida all’installazione passo-passo creata da un cliente finlandese che ha comprato il nostro distanziale al volante e ha condiviso con noi tutto il processo di installazione.
Una tipica collaborazione con i nostri clienti: se non abbiamo ancora foto di un distanziale al volante installato su una specifica macchina (in questo caso una vecchia Yaris T-Sport), in cambio di un rimborso parziale, chi lo acquista manda almeno 4 foto di buona qualità da usare su questo sito.
Le collaborazioni non si fermano qui: in questo caso il nostro cliente si è messo con pazienza a scrivere un vero e proprio piccolo manuale di istruzioni, con tanto di foto.
Lo riportiamo tale e quale, senza correzioni. Anche perché non ce n’è bisogno.
Il cliente è Onni dalla Finlandia, quindi il testo è in inglese.
… So here are my pictures, and also additional notes, that I found helpful:
- 1. disconnect the battery. and wait around 15 minutes.
- 2. make sure your steering wheel is straight, because then it is easier to put it back in correct position.
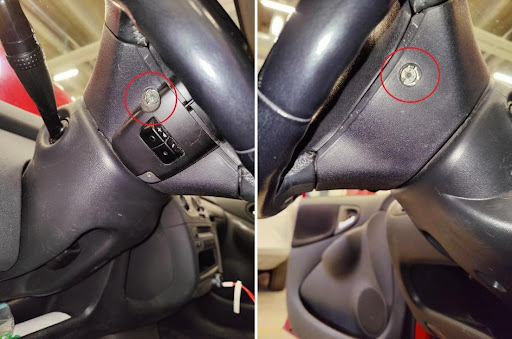
- 3. unscrew two torx screws. To fully disengage them from airbag frame, push that plastic around the screws towards inside. There are some plastic clips, that pull screws out from the airbag frame. Lay the airbag unit face side up in a safe place.
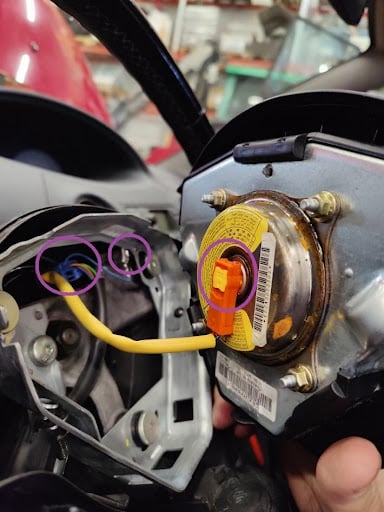
- 4. carefully remove airbag wire connector by first lifting yellow safety lid with small screwdriver and then remove connector itself. Then you need to remove also connector for radio buttons (blue) and you can also remove grounding wire at this point from steering wheel frame.
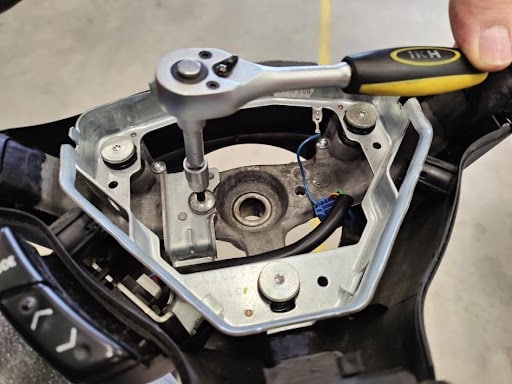
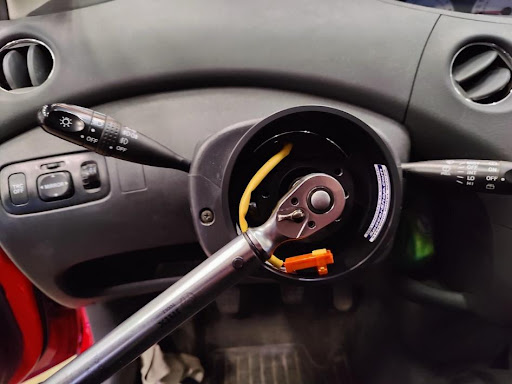
- 5. Open the steering wheel center nut without removing it completely yet. So you can pull it without hitting you head, when it comes loose.
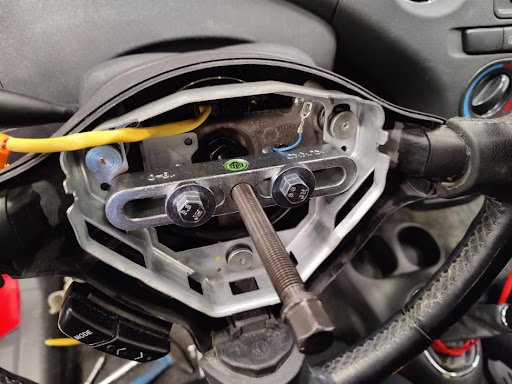
- 6. You can just pull steering wheel off with hand, by pulling it from one side at a time, and giving it some sharp / hard pulls. I decided to use universal extractor, which can be attached to two M8 screw holes. If you use extractor, you will need to remove screw holding the radio button module in place Universal extractor in picture below.
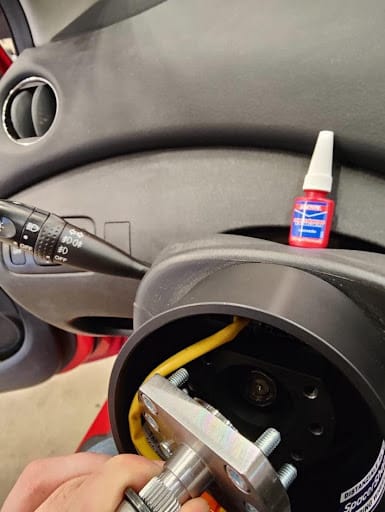
- 7. once you have got steering wheel off, you can insert aluminium side of the steering wheel spacer in place, and tighten it’s central nut to 40 Nm
- 8. Then you can fit the splined steel piece to aluminium piece using bolts provided with spacer, use loctite 243 thread locker. Tighten bolts to 10 Nm.
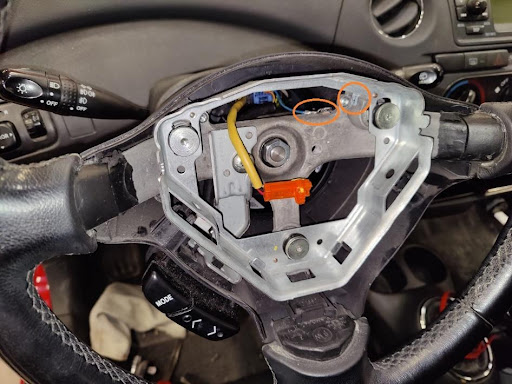
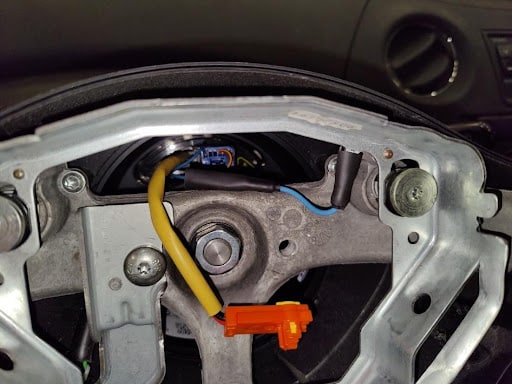
- 9. Then you can fit the steering wheel back in place. It is needed to re-route wire from radio button module to it’s connector from backside of the wheel frame (between plastic wheel cover and steering wheel frame piece), as it’s pretty short. That re-routing makes grounding wire too short (highlighted here in orange), so it will need some extension. grounding wire extension in picture below After re-routing radio button -wire and making extension to grounding wire, they can be attached to their connectors.
- 10. Then you can connect airbag connector back to airbag unit, and push that yellow clip back in place. Then place airbag in it’s place, and tighten two torx screws back in place. And after all you can connect car’s battery.
- 11. ready.

